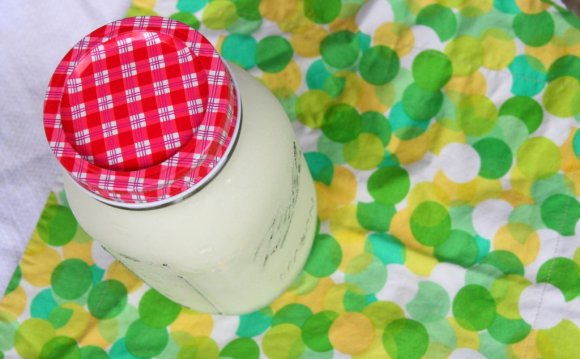
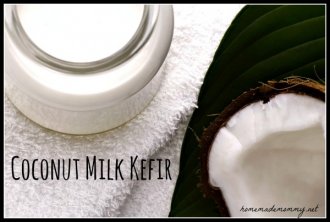
 If you have a dairy allergy or intolerance, are Paleo or vegan, this recipe is for you! You can enjoy all of the benefits of kefir with coconut milk! This is actually how I started making my kefir because I thought was intolerant to cow’s dairy (it turns out I was just intolerant to pasteurized cow’s milk – fancy that). I was also making cow milk kefir using raw milk for my family and I tried it and was perfectly fine so I quickly switched over to that from coconut milk kefir. Since then many of you have asked me for a recipe for coconut milk kefir and I finally getting around to posting it. I got my original help on this from Jenna at so thank you to her! I also have a reader who makes this very successfully and who gets their grains from me quite often.
One caveat: your milk kefir grains really do prefer cow or goat milk to coconut. To keep your kefir going and to maintain strong and healthy grains, you will need to do one of two things:
- Refresh your grains in a batch of cow or goat milk every 2-3 weeks (rinsing in between with filtered water only if you have a severe allergy) OR
- Realize your grains will only last about 3 months (please tell me if anyone has had them last longer!) and find a good source from a neighbor or friend to keep you with grains for when yours die
Other than this your recipe is fairly straightforward. Note that you may need to make a few batches to allow time for your grains to ‘adapt’ or ‘take’ to the coconut milk.
Ingredients
1 can whole coconut milk or 2 cups homemade coconut milk
Equipment needed – fermentation jar or plain old Mason jar secured with a coffee filter and rubber band, nylon strainer
Directions
Place can or homemade coconut milk into your jar and add the grains. Cover and place in a cabinet or pantry for 24-36 hours. The length of time will depend on the conditions in your kitchen. Start tasting the kefir after about 18 hours the first time. Keep tasting until it gets a bit effervescent and sour tasting. Then it is done. It will take longer if your kitchen is very cold and shorter when it is warm. Just keep testing it to see when you like the results and that will be your sweet spot of time.
Strain the kefir through your nylon strainer. Place the strained kefir in the fridge where it will get thicken with the cold temperature. Put the kefir grains back into your fermentation or mason jar and repeat the process by adding more coconut milk. There is no need to rinse the grains after each batch.
Enjoy in smoothies or with berries and soaked oatmeal or just plain with a drizzle of honey!
If you have any questions check out my kefir Q&A – many of those answers will apply to your coconut milk kefir making. Please note your grains will most likely not replicate or grow when using milk kefir grains for coconut milk kefir so you shouldn’t run into any issues with that!
YOU MIGHT ALSO LIKE


INTERESTING FACTS
-
 Guar gum, also called guaran, is a galactomannan. It is primarily the ground endosperm of guar beans. The guar seeds are dehusked, milled and screened to obtain the guar gum. It is typically produced as a free-flowing, pale, off-white-colored, coarse to fine ground...
- Fermented dairy comestibles are foods made from the fermented milk of various animals. A widely known example is yoghurt, a semisolid food made from fermented milk that has been strained to remove a portion of the liquid. Another variety, kefir, uses a wide variety...
Share this Post
latest post
-
 Six Star Pro Nutrition Casein protein July 18, 2018
 -
 What foods have Casein protein? July 15, 2018
 -
 Kefir grains at whole foods July 12, 2018
 -
 Cultured milk products July 9, 2018
 -
 What stimulates milk production? July 6, 2018
 -
 Milk and mucus production July 3, 2018
 -
 Does whey protein have Casein June 30, 2018
 -
 What is Micellar Casein protein? June 27, 2018
 -
 Casein protein necessary June 24, 2018