Steps
Part 1
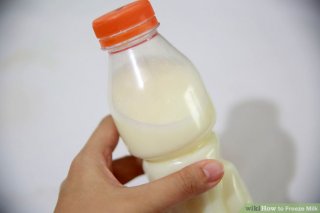
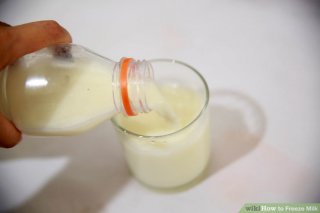
Freezing Your Milk- Leave room for your milk to expand. When milk freezes, it takes up a little more space that when it's liquid. If your milk's container is filled to the brim, this can cause it to burst in the freezer, making a huge frozen mess (this is especially true for hard glass jugs). Luckily, this is easy to prevent — just pour off about a cup of milk so that you have a few inches of room at the top of the container. Doing this gives the milk plenty of room to expand.
- On the other hand, if you've already drunk more than a cup or two of your milk, you can usually skip this step.
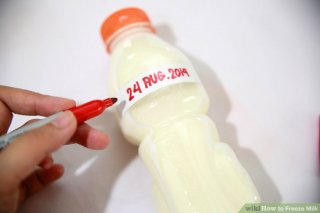
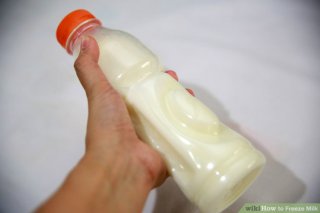
- Date your container. Once you freeze your milk, the expiration date on the jug becomes basically meaningless unless you thaw it again right away. For this reason, it's a wise idea to label your container with both today's date and the number of days remaining before it expires. You can write this directly on the container with a marker, or, if you prefer not to mark your container, you can use a piece of masking tape as a label.
- For example, if it's August 24th and the milk expires on August 29th, we might label the container with the text "Frozen: Aug. 24 — five days to expire" so that we'll know how long we have to drink the milk when we thaw it in a month or two.
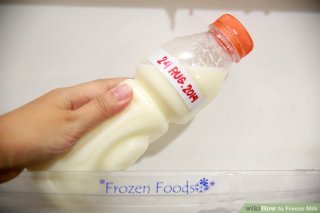
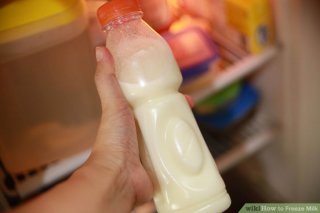
- Put the milk container in the freezer. You're all ready to freeze your milk — simply set your labeled container in a freezer with a temperature below 0o F/C. If you can't fit the entire container in the freezer, consider dividing the milk into several smaller containers.
 Within about a day, the milk should be frozen solid.
- When the milk is frozen, you may be able to see the separation of the milk and the fat. Don't worry — this is a normal part of the freezing process and is perfectly safe.
- Store for up to 2-3 months. Most sources recommend leaving your milk in the freezer for a maximum of either two or three months. Some sources even recommend freezing milk for up to six months. The general consensus seems to be that milk can last a very long time in the freezer but that it will gradually absorb the flavors and odors of other items in the freezer over time, becoming less appealing to drink.
- Note that richer dairy products, like eggnog, buttermilk, and cream generally have similar shelf lives to ordinary milk (or slightly shorter) when frozen — usually on the order of one to two months or so.
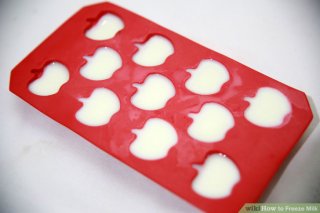
- Consider freezing in ice cube trays. As an alternative to freezing your milk in its container, you may want to consider pouring a portion into ice cube trays. This is an especially good choice for people looking to use their frozen milk in baking projects, as it allows you to quickly add semi-standard portions of milk to your recipe rather than having to chip away at a single solid block of milk or wait for it to thaw.
- Frozen milk cubes are also good for adding to glasses of fresh milk — they keep it cold, but won't dilute it when they melt like ordinary ice cubes.
 Part 2
- Thaw your milk in the fridge. The trick to thawing frozen milk is to use a slow, gradual process, never a quick one. For this reason, the easiest way to thaw your milk is usually simply to transfer it from the freezer to the refrigerator. The slightly warmer temperatures of the refrigerator will allow the milk to thaw to a liquid state little by little.
- This can take some time — depending on the volume of your frozen milk, it's not uncommon for it to take up to three days to thaw completely in the refrigerator.
- For quicker thawing, soak in cold water. If you're in a hurry to thaw your milk, try filling your sink with cold water (not hot water) and submerging your frozen milk container in it. Use a heavy object like a cast iron pot to hold the milk underwater as it thaws. This process will be quicker than thawing the milk in the refrigerator but will still usually take several hours, so be patient.
- The reason that water thaws milk more quickly than the refrigerator has to do with the way that energy is transferred between the milk and its surroundings at a molecular level. Liquids transfer heat energy into ice much more effectively than air, making them a much quicker method of thawing.
- Don't use heat to thaw the milk. Never try to thaw your frozen milk quickly with heat. This is a sure-fire method for ruining your milk and undoing your hard work. Heating the milk can cause it to thaw unevenly or even burn, leaving you with a very unappealing finished product. Listed below are just a few tips for avoiding this situation:
- Don't leave your frozen milk out at room temperature.
- Don't thaw your milk in the microwave.
- Don't thaw your milk in hot water.
- Don't thaw your milk in a pot or pan on the stove.
- Don't thaw your milk in the sun.
Source: www.wikihow.com
YOU MIGHT ALSO LIKE

Freezing Milk -Cream - Coconut Water For Later USE

My Breast Milk Freezer Storage + Organization

Freeze-Away
Share this Post
latest post
-
 Six Star Pro Nutrition Casein protein July 18, 2018
 -
 What foods have Casein protein? July 15, 2018
 -
 Kefir grains at whole foods July 12, 2018
 -
 Cultured milk products July 9, 2018
 -
 What stimulates milk production? July 6, 2018
 -
 Milk and mucus production July 3, 2018
 -
 Does whey protein have Casein June 30, 2018
 -
 What is Micellar Casein protein? June 27, 2018
 -
 Casein protein necessary June 24, 2018